Admin Translations
Admin Translations is a translation manager package. It scans your codebase and stores all the translations in the database. Once stored it provides nice UI to manage stored translations. It defines a custom translation loader overriding default Laravel's one, so the translations are automatically loaded from the database.


It's heavily inspired by spatie/laravel-translation-loader, which we originally wanted to use, but we were missing some important features (support for translation namespaces etc.). We have also inspired by themsaid/laravel-langman with the scanning process.
Requirements
This package requires PHP 7.0+ and Laravel 5.5.
It has it's own UI based on these dependencies:
brackets/admin-uibrackets/admin-listingbrackets/translatable
Installation
{danger.fa-exclamation-triangle} This section is only when you want to use this package as a standalone package. If you are using with Craftable, then this package is already installed.
First, let's require this package.
composer require brackets/admin-translationsProvider will be discovered automatically.
{info} If you did not installed
brackets/admin-uiyet, this is the moment you should. Follow the Admin UI Installation.
Now let's install this package using:
php artisan admin-translations:installFinally we need to compile all the assets using npm:
npm install && npm run devAuthorization
{info} This section is for those of you who use this package as a standalone package (without
brackets/craftable). If yo are using Craftable, you can safely skip this chapter :)
This packages provides routes that are for security reasons protected with 3 different abilities:
admin.translation.indexadmin.translation.editadmin.translation.rescan
But the package does not define these abilities, that's left to you and your specific use case.
How to quickly set it up? Let's assume, your use case is, that any logged user should have all those abilities. To get it working all you have to do is edit your AuthServiceProvider class and define these abilities:
class AuthServiceProvider extends ServiceProvider
{
    ...
    public function boot()
    {
        Gate::define('admin.translation.index', function ($user) { return true; });
        Gate::define('admin.translation.edit', function ($user) { return true; });
        Gate::define('admin.translation.rescan', function ($user) { return true; });

        $this->registerPolicies();
    }
What if you don't have any authentication interface yet and you just want to play around with this package? You can still do it:
use App\User;
use Illuminate\Support\Facades\Auth;

class AuthServiceProvider extends ServiceProvider
{
    ...
    public function boot()
    {
        // let's authenticate some fake user
        if (!$this->app->runningInConsole() && !Auth::user()) {
           Auth::login(factory(User::class)->make());
        }

        Gate::define('admin.translation.index', function ($user) { return true; });
        Gate::define('admin.translation.edit', function ($user) { return true; });
        Gate::define('admin.translation.rescan', function ($user) { return true; });

        $this->registerPolicies();
    }
Usage
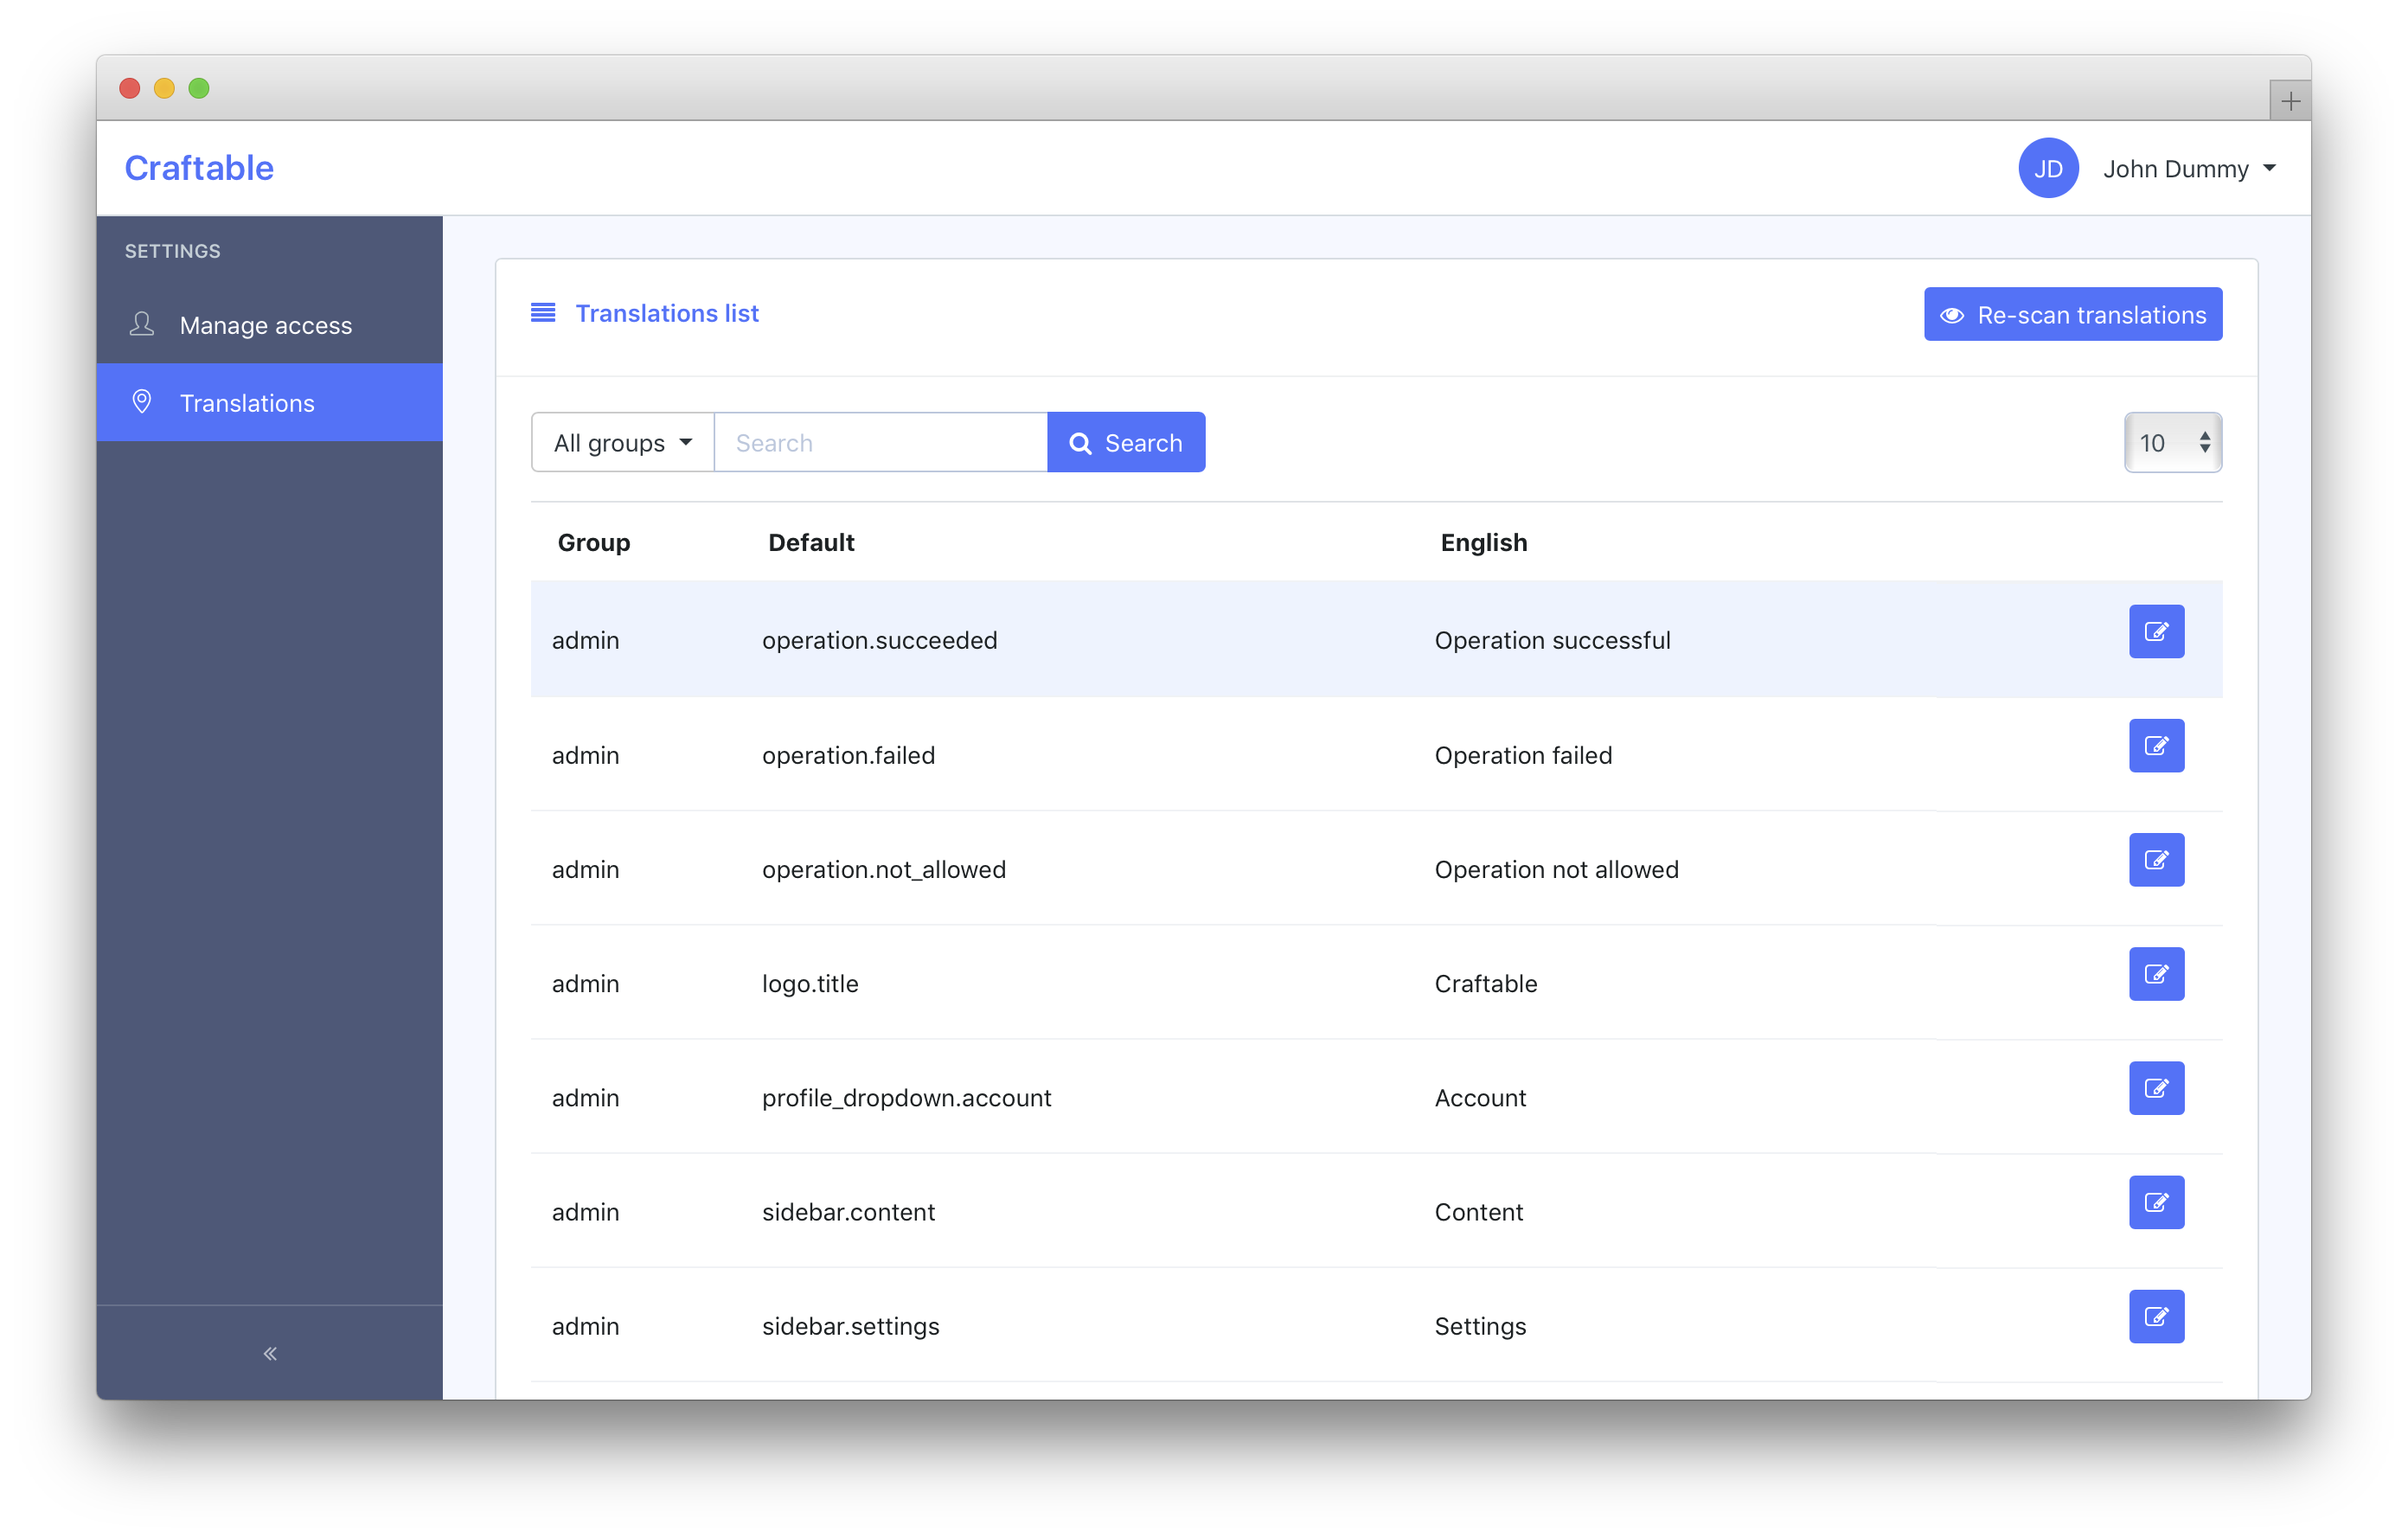
Navigate your browser to the /admin/translations and you should be able to see the translations manager.
If you don't see any translations, start with scanning the directories - click Re-scan translations button. By default app and resources/views folders are scanned (you can change this in the config admin-translations.scanned_directories):
This is going to look your at your codebase and search for used translations (in all .php files). It supports these methods of retrieving the translations:
trans()trans_choice()__()Lang::get()Lang::choice()Lang::trans()Lang::transChoice()Lang::getFromJson()@lang()@choice()
It automatically stores all new translations and it also soft-deletes all unused translations (they will be restored once they pop in again in your codebase).
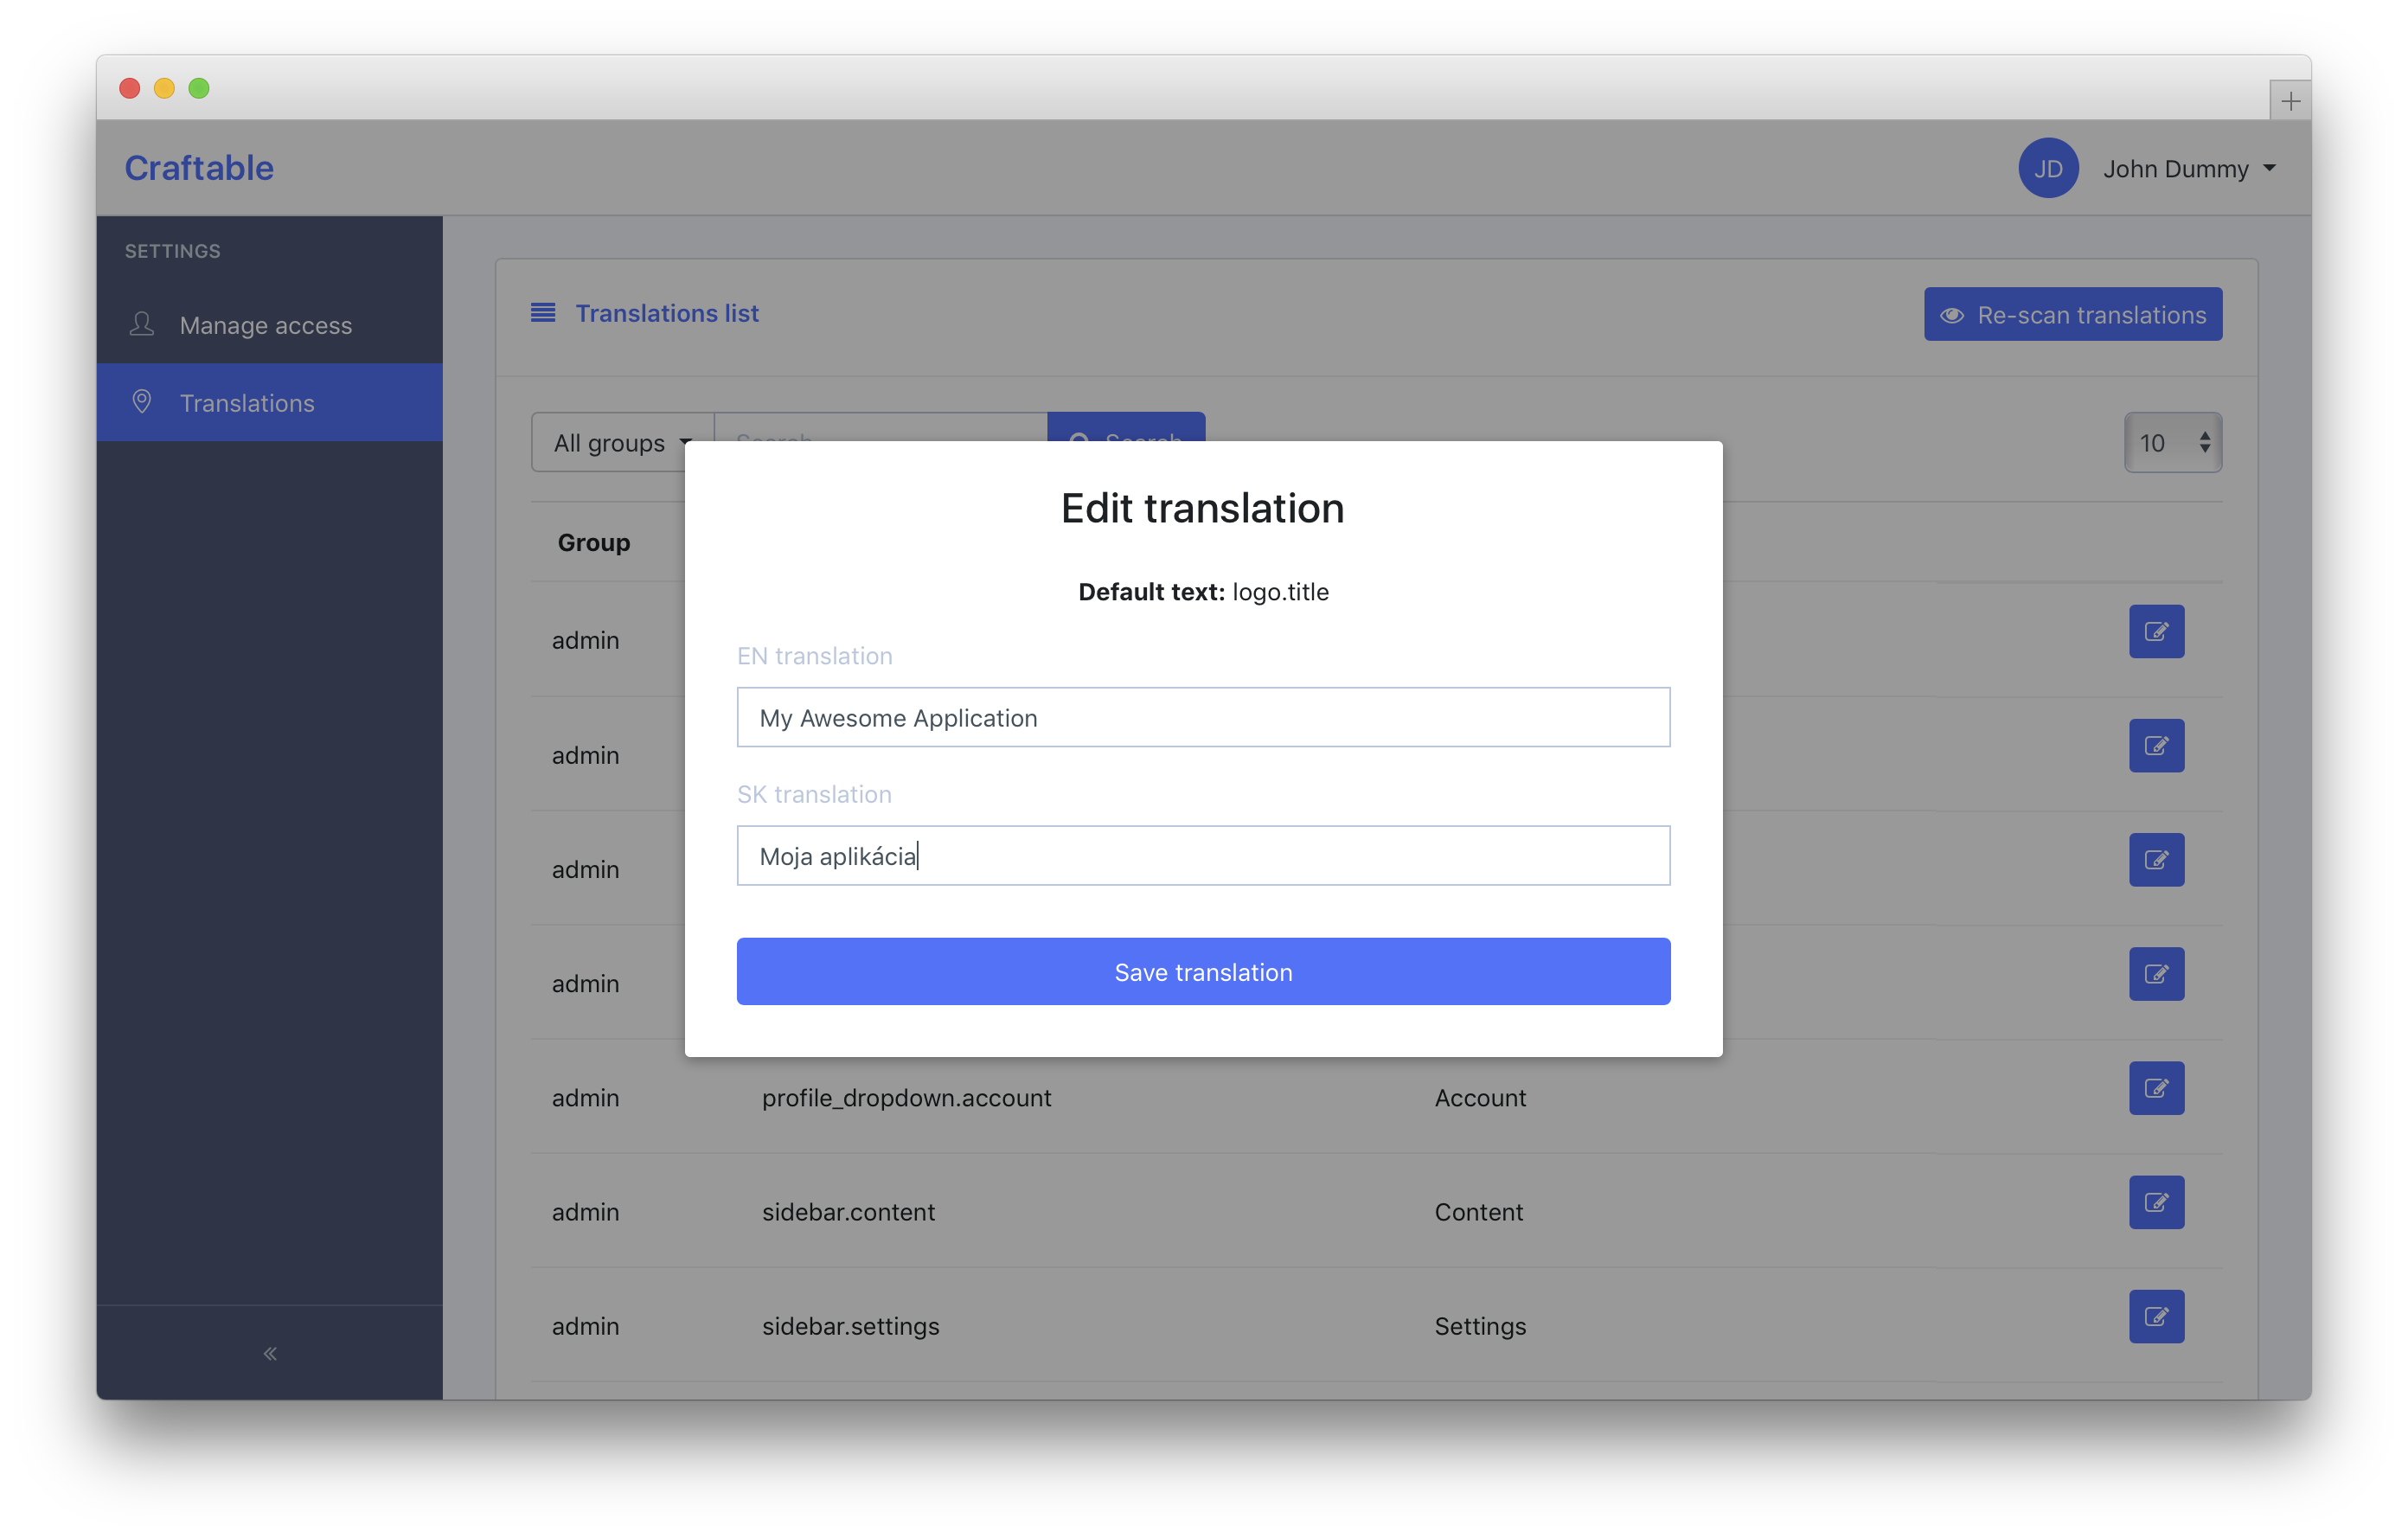
Once scanned and saved manager is ready to use and you can edit any translation for every locale your application uses.
{info} You probably want to add command
php artisan admin-translations:scan-and-saveto your build process to automatically re-scan the codebase with every deploy.